Making "Messie Ness": tools to aid previsualization - Part 1
Created in 10/24/2022, 12:00:00 AM
Given my first job and personal commitments I have been always hungry for any solution that could help me to quickly previsualizing, pre conceptualizing, designing and even producing the storyboards of my comics.
As like as any other tools in the world you have to sharpen your tools and abilities, though, today, at the cost of $ 0, you can do it!
Certainly one of these tools can be Blender.
Using Blender to previsualize "Messie Ness"
For who don't know it yet, Blender is a free and open source 3D suite that allows an artist to create a 3D scene or animation starting from modeling and ending up to a realistic physically based rendering (PBR).
My foundamental requirement was to be able to quickly setup a preview of a comic panel (including environment) to quickly previsualize it and subsequently sketch and paint it using Krita and a Wacom tablet. In fact "Messie Ness" is supposed to be realized with Digital Painting with the aid eventually of other CGI techniques like NPR.

bnpr a Website dedicated to non photorealistic rendering made in Blender.
As a secondary requirement I thought that it would be nice if I can even design "Messie Ness" world directly in Blender eventually using a mix of free and self produced 3D assets.
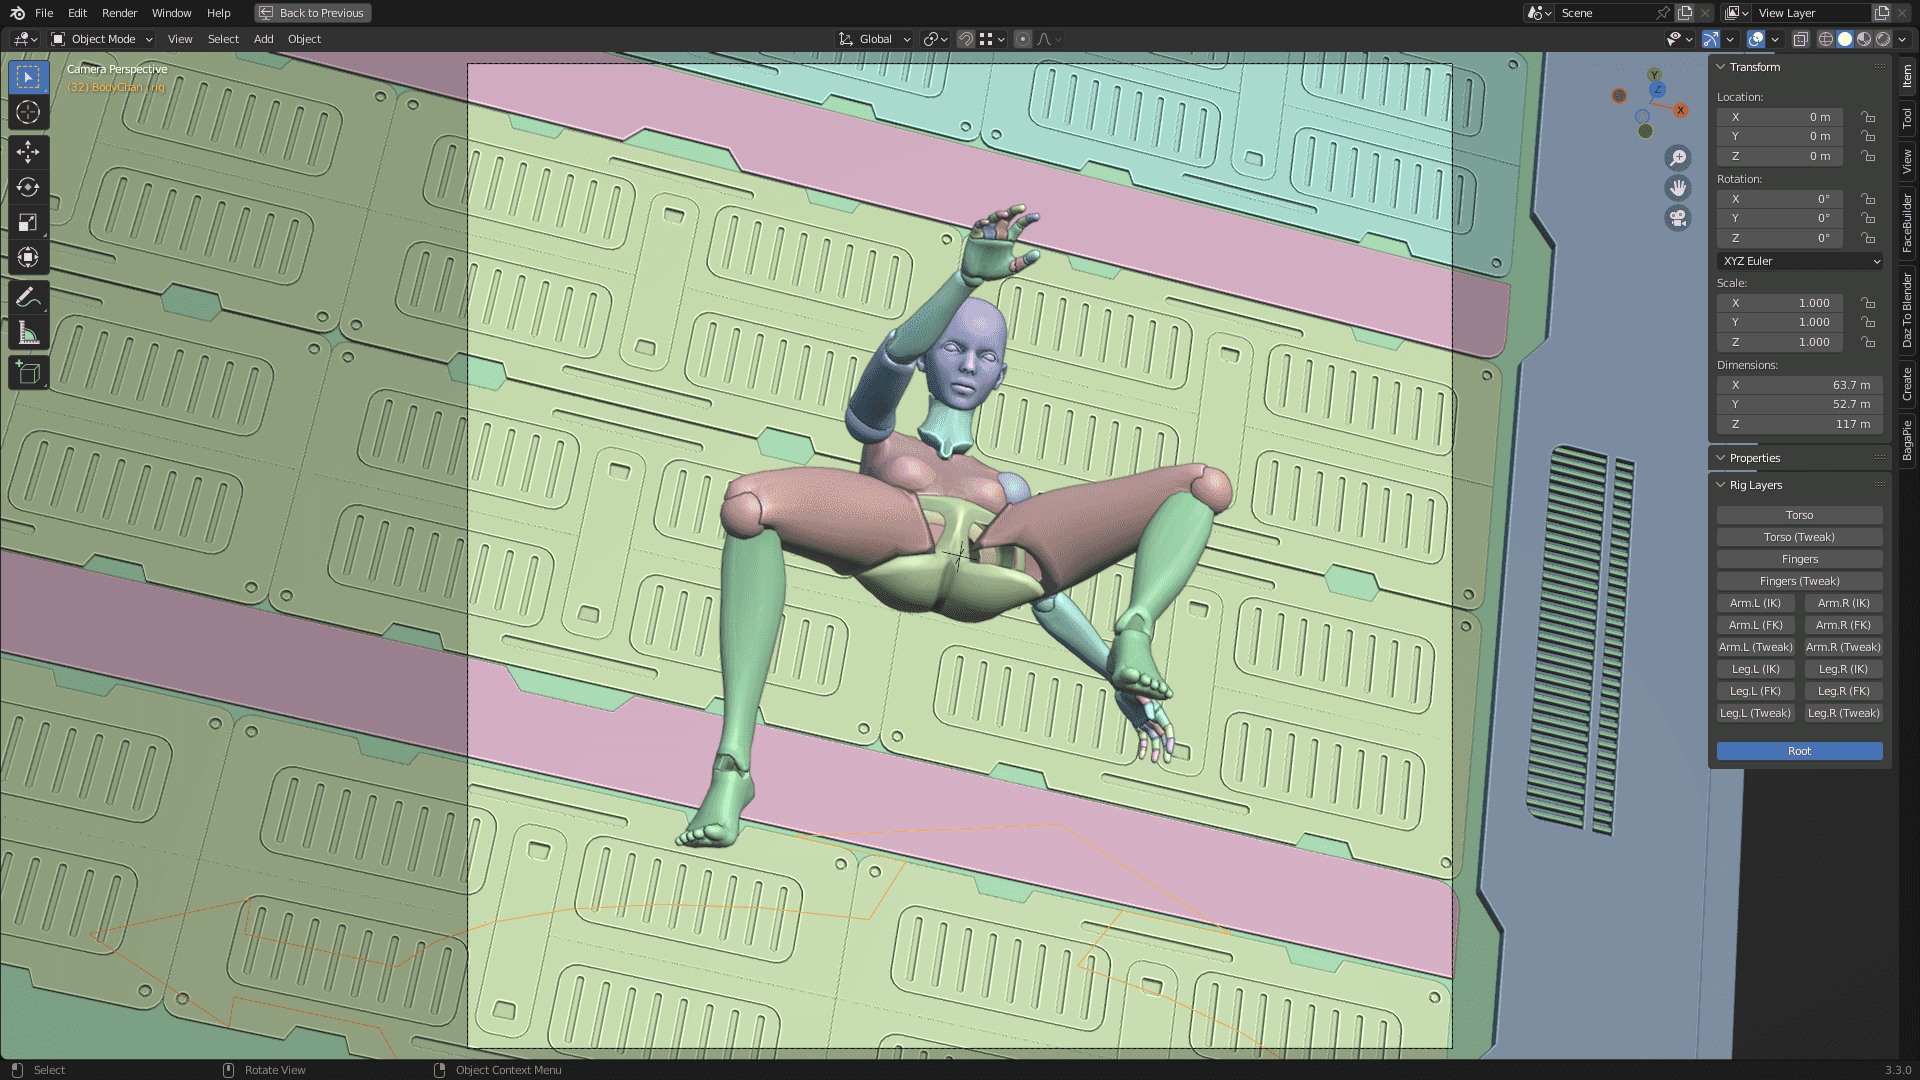
All of these goals are possible not only because of Blender but thanks to the artists community often sharing assets for free. For example, the puppet visible in the previous picture is a rigged model BodyChan - BodyKun | Posable Drawing Figures by vinchau and the plates behind it are Sci Fi Panels Blender by Chuck_CG.
So, lets talk about pose dummies!
Pose Dummies... and where to find them
As I mentioned above currently I am testing BodyChan - BodyKun | Posable Drawing Figures by vinchau. So far this has been the simplest solution i found: entirely based on Blender and posable thanks to its Rigify armature. Very, very simple to use.
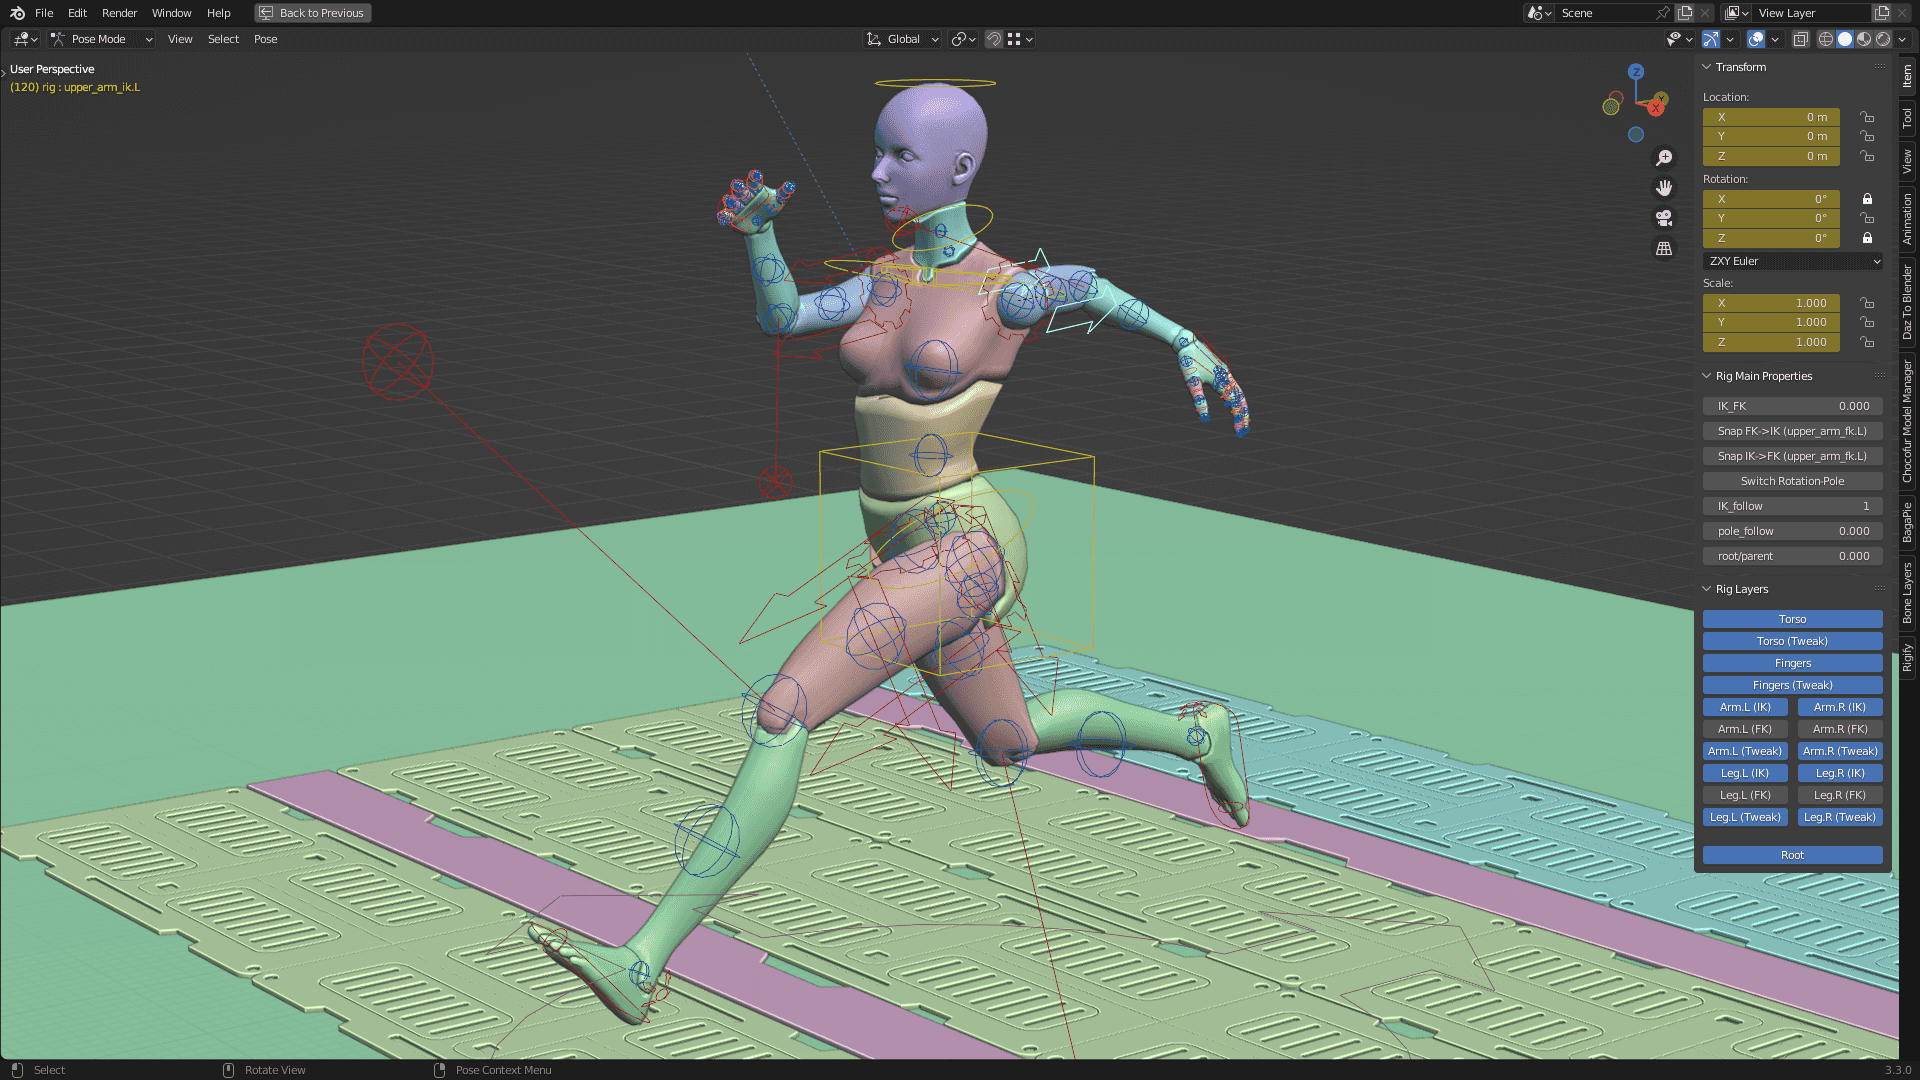
In the picture the relevant control bones are clearly visible and in the Sidebar on the right side of the 3D Viewport editor you can view the Rig Main Properties and the Rig Layers panel with the bone layers that are visible (blue) or hidden (gray).
Of course this is not the only free rigged model you can find on the Web. Also I am not a fan of Rigify though for this purpose it is the fastest solution I am aware of.
Speaking of BodyChan and BodyKun models, recently another author, angavrilov, published a new version of the characters that includes several updates, some of which depending on Blender 3.0 and above: Blend Swap | Knee/Elbow IK Rig for BodyChan/BodyKun. Though I did not test the released file yet.
Other pose dummies I found on BlendSwap are: Blend Swap | Human Skeleton Rigged, Blend Swap | Body Mechanics Rig v1.0 and Blend Swap | dummy 1.
Asset Browser: creating an environment for Messie to act
Another extremely interesting feature of Blender is the Asset Browser and I am leveraging it to my needs.
Blender assets management functionalities helps you to organize all the assets you want directly into Blender... Even if they are a little bit unusual in the way they work.
The point is that when you have your catalog ready, composing your scene is matter of picking an object from the Asset Browser and drag and drop it in the scene.
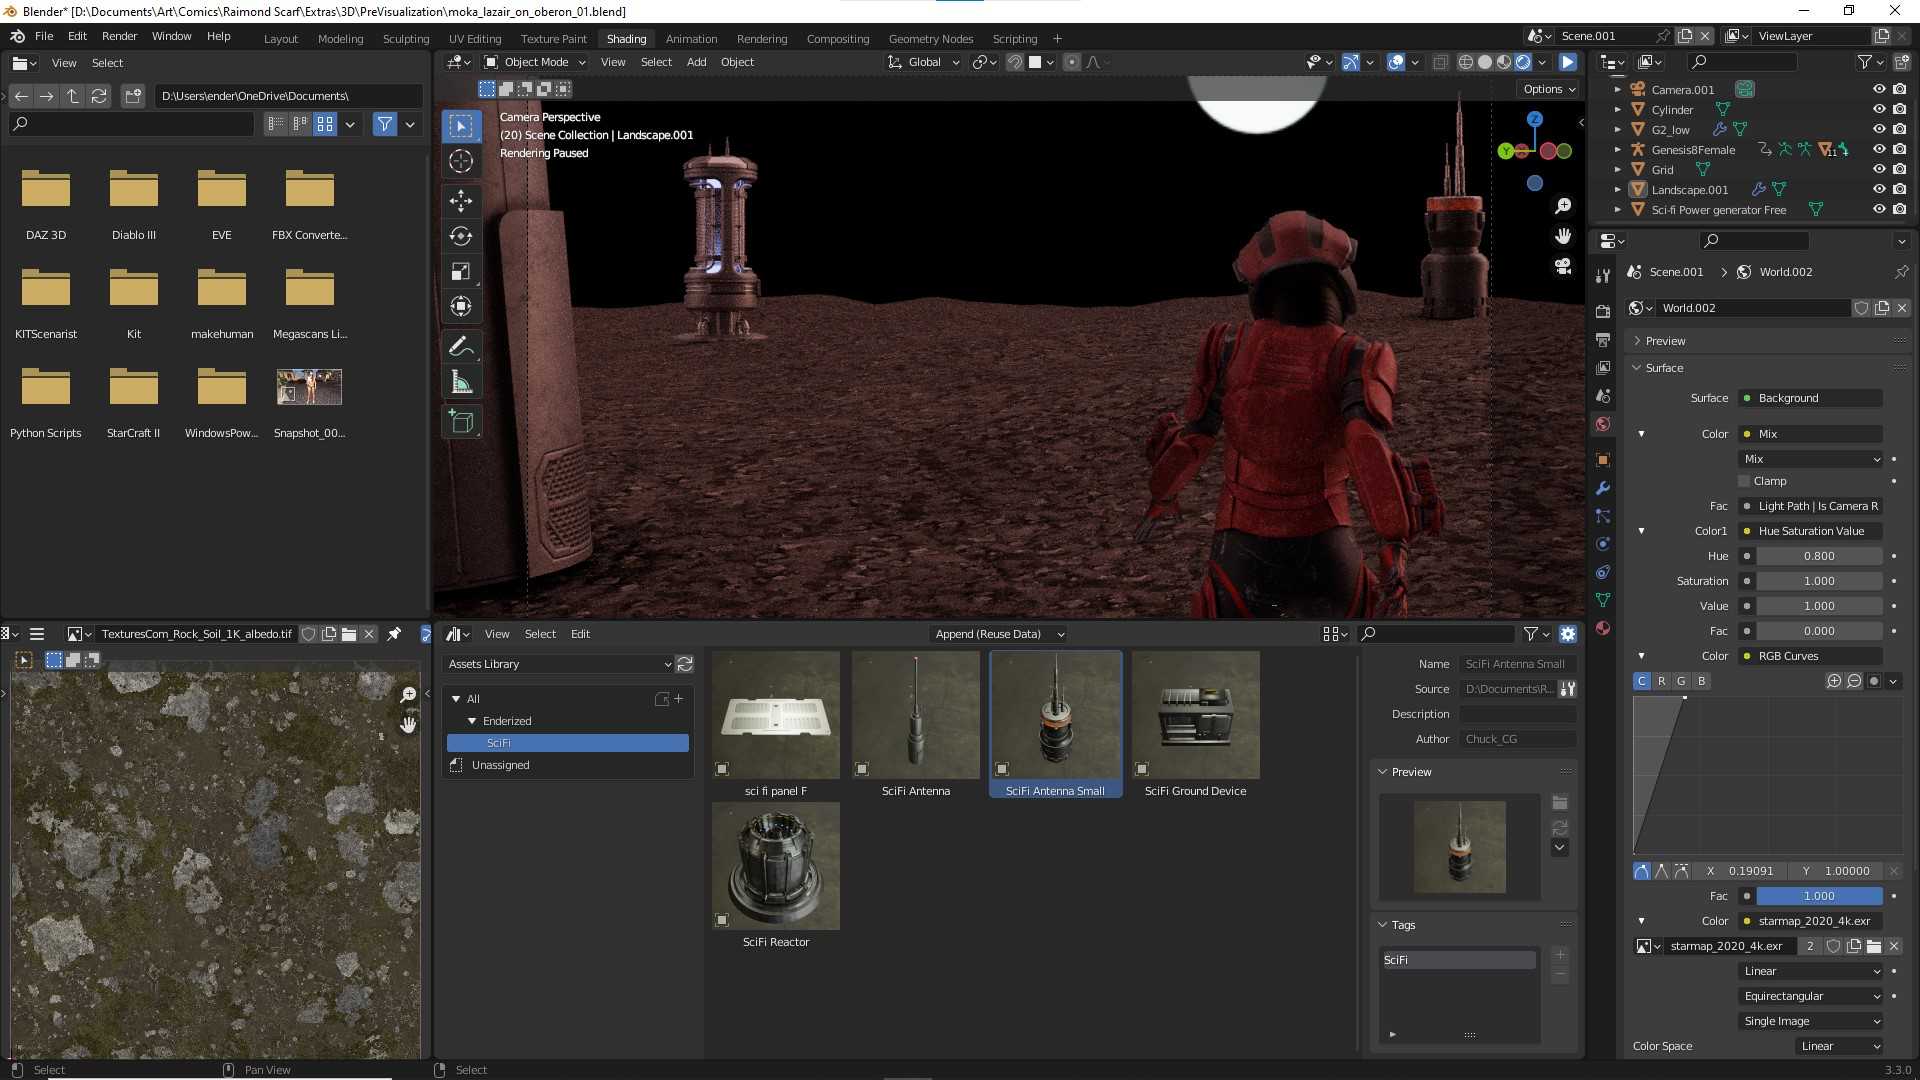
The image above comes from a WIP project of mine. A quite simple idea. I asked myself: "How would actually be to see Moka Lazair (a support character from my comic book project 'The importance of being alien') walking in a space suit on the surface of any solar system satellite, like Oberon?".
In the above image I used (so far) seven assets, some of which already organized in my own assets catalog "SciFi".
Though not all comes ready to use. In fact everything depends on your needs. Blender does not support assets including parent-child hierarchy. Models must be a single mesh or you have to manually drag and drop in the scene every single part of the model. Most of the times I find more easy to drag a single object and have my model ready. So, to make some Chuck_CG models suitable to behave as single object I had to merge together the single geometries of which they were composed and create a modified version of his assets. Also his models where probably made with a version of Blender before the introduction of the Asset Browser therefore I hade to prepare his models and mark them as assets.
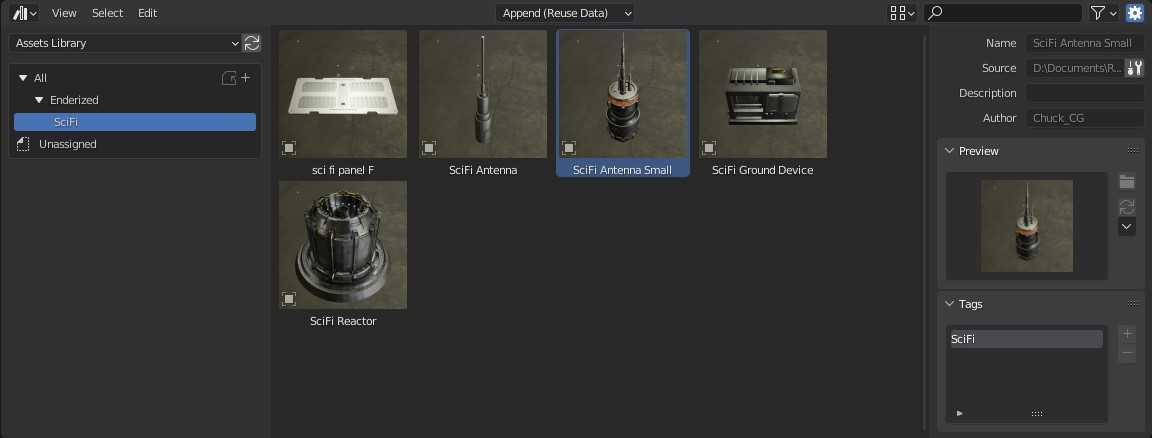
The Asset Browser permits to define a name for the asset, a description, the author name or nickname, a preview icon and tags. For example I generated the preview icons for my catalog.
The assets used in this composition
So, where did I find all this (free) assets? Basically searching in the Internet with Google.
Chuck_CG SciFi Antennas
The close left and far right antennas are two models by Chuck_CG, preciselly from his Gumroad product Sci-Fi Assets for which he provided even two tutorials: How to Create Hanging Cables in Blender+Free Assets and How to DRAW 3d cables in BLENDER (that could be actually interesting to populate the ground of my image).
SciFi Generator and Space Suit
In the middle I used the Sci-Fi Generator by qwestgamp, found on RenderHub, while the character I used is the AEPC SUIT by Guru Pradeep (@pradeeplukk), found on Sketchfab.
Accurate Stars Map
The stars map used as the only source of illumination (we are ideally on the dark side of Oberon outer satellite of Uranus) comes directly from NASA SVS: Deep Star Maps 2020 or the 2012 version SVS: Deep Star Maps. They require to give credit using this disclaimer: "NASA/Goddard Space Flight Center Scientific Visualization Studio. Gaia DR2: ESA/Gaia/DPAC. Constellation figures based on those developed for the IAU by Alan MacRobert of Sky and Telescope magazine (Roger Sinnott and Rick Fienberg).".
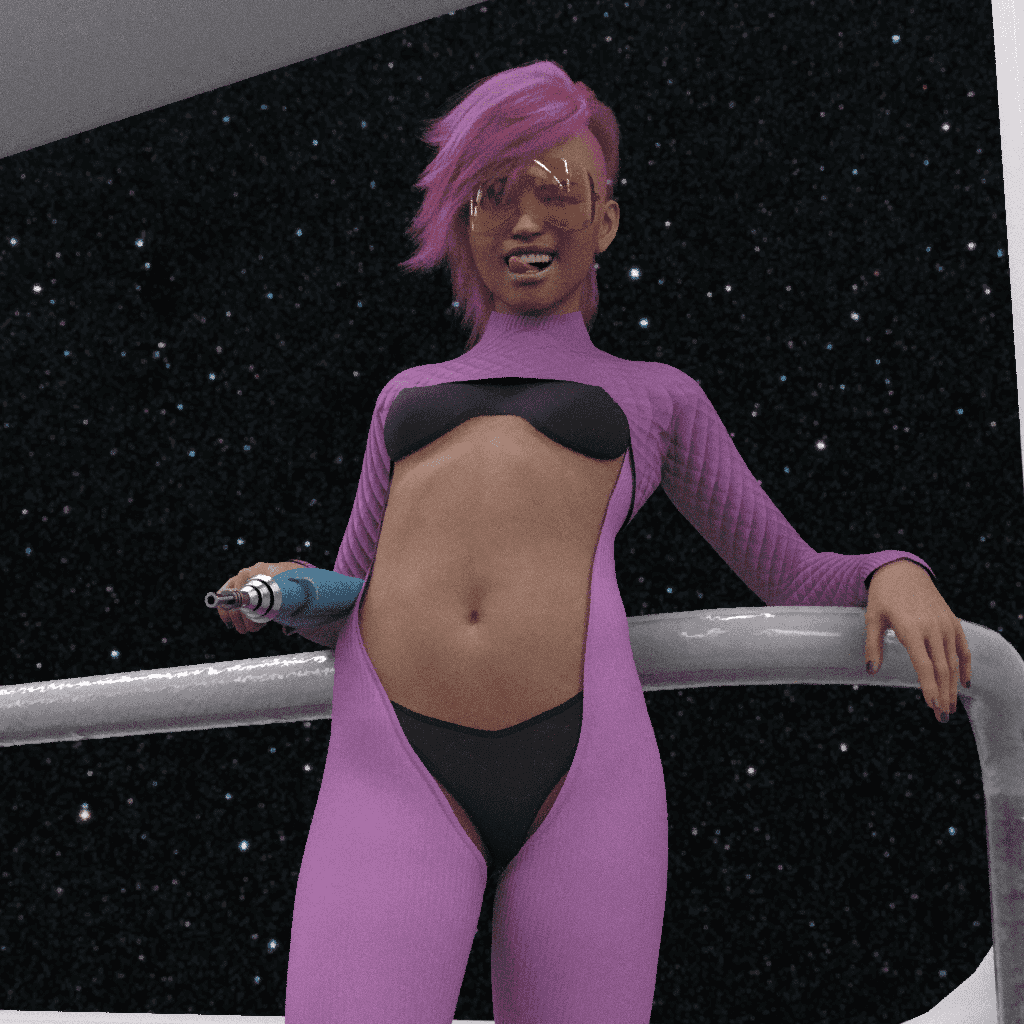
This is the same stars map that I used in the image below titled "Samantha confident in Space", composed and rendered in DAZ Studio 4.21 Pro (with some help from Blender) and featuring sci fi corridor by Chuck_CG, Samantha Character Morph For G8 and G8.1 Female by HumanXYStudio, Space Girl Outfit for Genesis 8/8.1 Female by Tiboza and Hair - Pugilist Punk for G8F by squarepeg3d.
But I will tell you about DAZ Studio Pro later (or in another article).
Terrain texture
Sicking back to the Oberon scene, the terrain rocky material is a basic PBR setup (as the result of the Node Wrangler addon command "Add Principled Setup") feeded with a set of PBR ready maps from Textures.com: the Iceland Rock Soil Gravel Ground - PBR0423.
Poliigon/BlenderGuru Uber Mapping Shader Node Group
Finally I also used the "Poliigon Uber Mapping" Node Group (to make the terrain texture distribution as much as random possible) appended from BlenderGuru_PoliigonNodes.blend file, that Andrew Price shared in the description of his tutorials How to Tile a Texture Without Repetition - Blender Tutorial and How to Render Millions of Objects in Blender.
Conclusion (so far)
So, all I did in this composition is: the lighting setup, the terrain model, the character pose, the background environment setup and rendering (Uranus is part of a 360° rendering tailored around this project), the composition and the rendering setup.
It is not finished yet though the project gave me a good grasp of what I can do to prepare a draft storyboard for the first episode of Messie Ness.